
Come digitalizzare i tuoi disegni da ricamo
Sommario
“Transform Threads into Pixels: Digitize Your Embroidery Designs with Ease!”
introduzione
Digitizing your own embroidery designs is a process that involves converting artwork into a digital file that an embroidery machine can interpret and stitch out. This transformation is achieved using specialized software that allows you to plot stitch types, directions, and sequences to bring your unique designs to life on fabric. Whether you’re an enthusiast looking to personalize projects or a professional aiming to expand your creative offerings, mastering the art of embroidery digitization can unlock endless possibilities for custom decoration on clothing, accessories, and home decor. With the right tools, patience, and practice, you can turn your artistic visions into embroidered reality.
The Basics of Embroidery Digitizing: Tools and Techniques for Beginners
Embroidery digitizing is the process of converting artwork into a digital file that an embroidery machine can interpret and stitch onto fabric. This transformation allows for the meticulous replication of designs, from simple monograms to complex patterns. For beginners eager to digitize their own embroidery designs, understanding the basics of this craft is essential, as it combines artistic flair with technical know-how.
The journey into embroidery digitizing begins with the selection of suitable software. There is a variety of digitizing software available, ranging from basic programs for hobbyists to advanced software for professionals. Beginners should look for user-friendly interfaces, comprehensive tutorials, and a strong support community, which can be invaluable resources as they navigate the complexities of the software. Some popular options offer trial versions, allowing users to test the features before committing to a purchase.
Once the software is chosen, familiarization with its tools and functions is the next step. Digitizing software typically includes a range of tools that allow users to create or import artwork, set stitch types, adjust stitch density, and map out the sequence of the design. Mastery of these tools is crucial, as they directly affect the quality and efficiency of the finished embroidery. For instance, understanding how to set the correct stitch density can prevent issues such as fabric puckering or thread breakage.
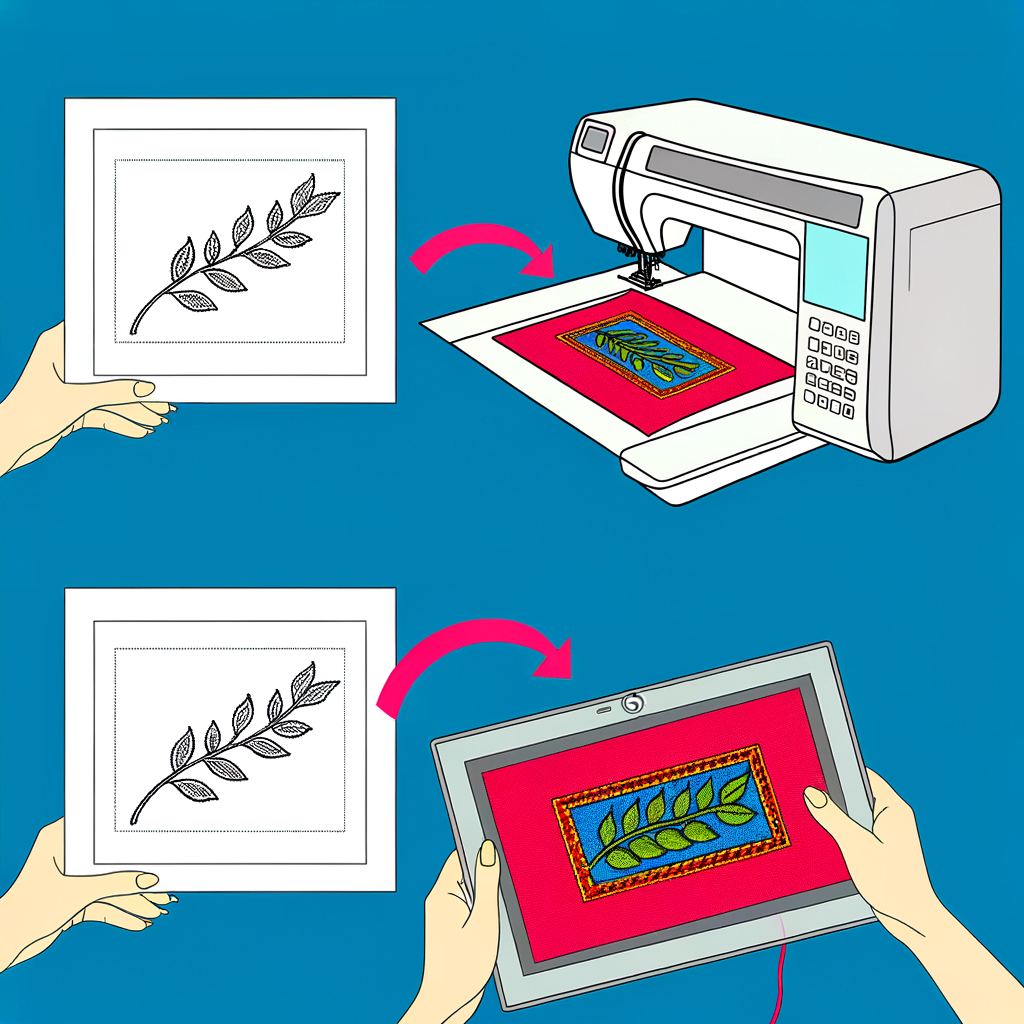
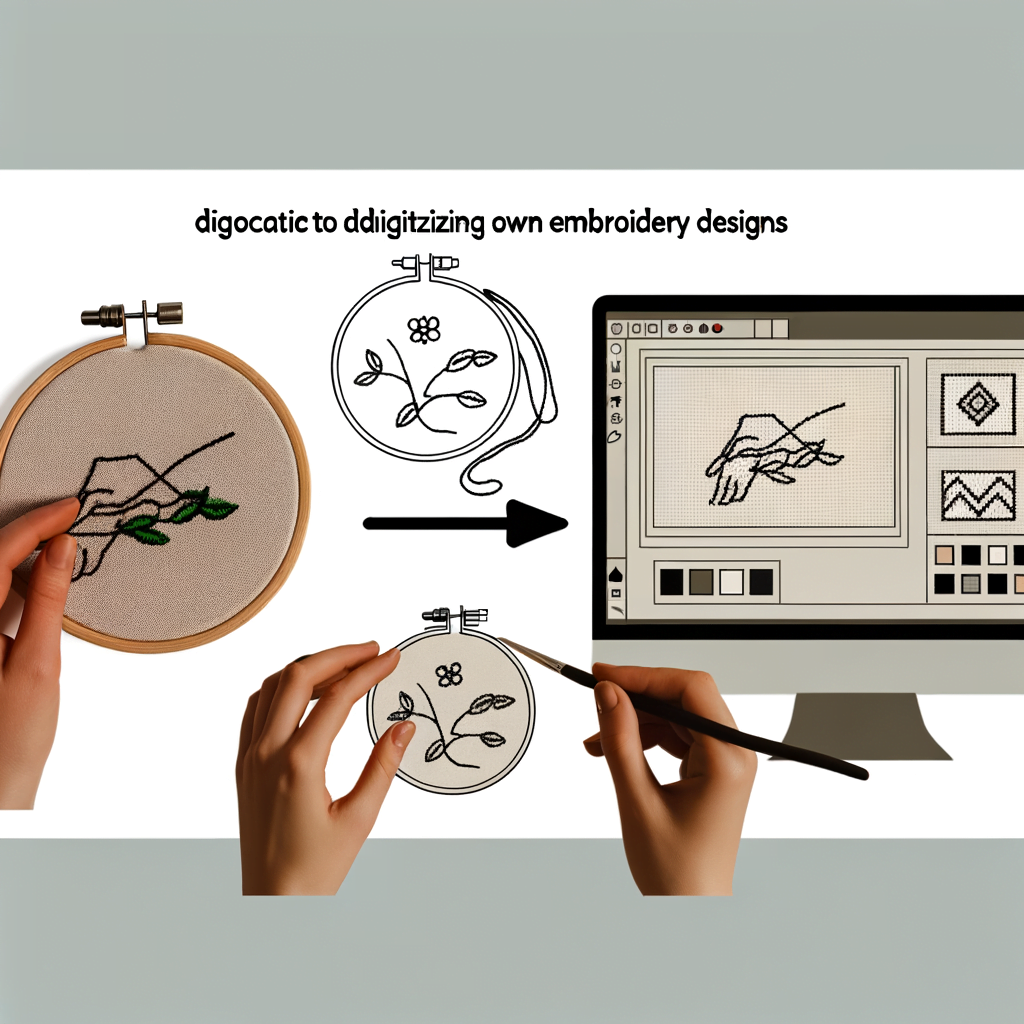
The digitizing process itself involves several key techniques. Initially, the artwork, whether drawn by hand or created in a graphic design program, must be imported into the digitizing software. The design is then traced or redrawn using the software’s drawing tools to create a ‘stitch file’. This file dictates the needle’s path and includes instructions on stitch types, such as run, satin, or fill stitches, which are used to create different textures and effects within the design.
One of the most critical techniques for beginners to grasp is the concept of underlay stitches. These foundational stitches are not visible in the final product but are essential for stabilizing the fabric and ensuring the top stitches lay flat and even. Proper use of underlay stitches can significantly enhance the appearance and durability of the embroidery.
Color changes and sequencing are also important aspects of digitizing. The digitizer must strategically plan the order in which colors are stitched to minimize thread changes and ensure a smooth stitching process. This requires foresight and an understanding of how different elements of the design overlap and interact.
Testing is an integral part of the digitizing process. Before finalizing the design, it is advisable to run a sample on a machine using the same fabric and threads intended for the final product. This test helps identify any potential issues with the design, such as gaps in stitching or misaligned elements, which can then be corrected in the software.
In conclusion, embroidery digitizing is a skill that marries creativity with precision. For beginners, starting with the right tools, dedicating time to learn the software, and practicing the fundamental techniques are the building blocks to successful digitization. By understanding the importance of stitch types, underlay stitches, color sequencing, and testing, even novices can produce professional-quality embroidery designs. As with any craft, patience and perseverance are key, but the reward of seeing one’s own artwork come to life in thread and fabric is well worth the effort.
Advanced Embroidery Digitizing: Mastering Software for Custom Designs
Embroidery digitizing is an intricate process that transforms any graphic or text into a stitch file that an embroidery machine can interpret. For those looking to personalize their embroidery projects, mastering the art of digitizing is essential. It allows for the creation of unique and custom designs that can be embroidered onto various textiles. This article delves into the advanced techniques of embroidery digitizing, guiding you through the steps to digitize your own designs using specialized software.
The journey into embroidery digitizing begins with the selection of the right software. There are numerous digitizing programs available, ranging from basic to advanced, and the choice depends on the complexity of the designs you aim to create. High-end software offers a plethora of features that can cater to intricate designs, providing greater control over stitch types, patterns, and sequencing. It is imperative to familiarize yourself with the software’s interface and tools, as this will be the foundation upon which your digitizing skills will develop.
Once you have chosen your software, the next step is to import the design you wish to digitize. This can be a drawing, a graphic image, or even a photograph. The software will allow you to trace or manually plot points around the design, which will serve as a roadmap for the stitches. Precision at this stage is crucial, as the placement of these points will determine the accuracy of the final embroidered design.
After plotting the design, the next phase involves selecting the appropriate stitch types. Embroidery stitches vary in texture and appearance, from the basic running stitch to the more complex satin and fill stitches. Each stitch type serves a different purpose and will affect the overall look and feel of the design. For instance, fill stitches are ideal for larger areas, while satin stitches work well for creating smooth, shiny borders. The software enables you to assign different stitch types to various sections of the design, allowing for a dynamic and textured final product.
Transitioning smoothly from stitch selection, the next consideration is thread color. Digitizing software typically includes a color palette that matches the thread colors available in the market. Selecting the right colors is not only about aesthetic appeal but also about ensuring that the colors translate well when stitched out. The software allows you to preview the design in different colors, helping you make informed decisions about your color scheme.
Another critical aspect of digitizing is setting the correct stitch density and tension. These parameters determine how closely packed the stitches are and how tight they pull on the fabric. Too high a density can cause the fabric to pucker, while too low a density may result in gaps in the embroidery. Similarly, incorrect tension settings can lead to thread breakage or uneven stitching. The software provides options to adjust these settings, ensuring that the design is not only beautiful but also structurally sound.
Finally, it is essential to test your digitized design. Running a sample on a piece of similar fabric to your final project can reveal any adjustments that need to be made. This step is crucial as it allows you to fine-tune the design, ensuring that the stitches align correctly and the colors blend seamlessly.
In conclusion, digitizing your own embroidery designs is a rewarding process that combines creativity with technical skill. By mastering advanced digitizing software, you can transform any image into a stunning embroidered piece. The journey from selecting the right software to testing the final stitch-out is meticulous, but with practice and attention to detail, you can produce custom designs that are both beautiful and uniquely yours.
From Sketch to Stitch: A Step-by-Step Guide to Digitizing Your Embroidery Artwork
Title: How to Digitize Your Own Embroidery Designs
Embroidery has long been a cherished craft, allowing artisans to create intricate designs with thread and needle. However, with the advent of technology, embroidery has entered a new era where designs can be digitized, allowing for precision and replication that hand stitching can’t easily achieve. Digitizing your own embroidery designs is a rewarding process that bridges traditional craft with modern techniques. This step-by-step guide will walk you through the process of transforming your sketches into stitch-ready digital files.
The journey from sketch to stitch begins with a clear concept. Before you dive into the digitization process, it’s essential to have a finalized sketch of your embroidery design. This sketch should be as detailed as possible, indicating not only the shapes and elements of the design but also the types of stitches you envision and the color scheme you intend to use. Once your artwork is ready, the next step is to choose the right digitizing software. There are several options available, ranging from beginner-friendly programs to advanced software used by professionals. Select a program that aligns with your skill level and the complexity of your designs.
After installing your chosen software, familiarize yourself with its features and tools. Most digitizing programs will offer a variety of stitch types, from basic running stitches to complex satin and fill stitches. Understanding how these work will allow you to effectively translate your sketch into a digital embroidery pattern. Begin by importing your design into the software. This can typically be done by scanning your sketch or using a digital drawing tablet to trace your design directly into the program.
Once your design is imported, the real work of digitization begins. Start by outlining the major elements of your design using the software’s drawing tools. This will create a map for your embroidery machine to follow. Carefully select the stitch types that best match the textures and effects you’re aiming for in each section of your design. For example, use fill stitches for larger areas of color and satin stitches for smooth, shiny details.
Attention to detail is crucial during this stage. The placement of stitches, their direction, and length all contribute to the final look and feel of your embroidered piece. Additionally, consider the order in which the machine will embroider the different sections of your design. This is known as the ‘stitch sequence’ and can greatly affect the efficiency of the stitching process and the quality of the final product.
After meticulously setting your stitch types and sequences, it’s time to select thread colors. Most digitizing software will allow you to choose from a wide range of thread palettes. Match these as closely as possible to your original sketch or the actual threads you plan to use. This will give you a realistic preview of the finished embroidery.
Before sending your design to the embroidery machine, it’s imperative to test it. Create a sample stitch-out on a piece of fabric similar to your final project’s material. This test will reveal any adjustments that need to be made, such as tweaking tension settings or modifying stitch paths. Once you’re satisfied with the test, your design is ready to be stitched onto your final fabric.
In conclusion, digitizing your embroidery designs is a process that combines creativity with technical skill. By carefully preparing your sketch, selecting the appropriate software, and meticulously mapping out your stitch paths and sequences, you can transform your artwork into a digital file ready for embroidery. With practice and patience, you’ll be able to bring your unique designs to life with the precision and repeatability that only machine embroidery can provide.
Conclusione
Conclusione:
To digitize your own embroidery designs, you need to follow a systematic process that involves selecting the right software, learning the basics of digitization, choosing and preparing your artwork, and then using the software to create a stitch file. The key steps include scanning or importing your artwork into the digitizing software, setting stitch types, determining the sequence of stitches, adjusting stitch density and thread tension, and finally saving the design in a format compatible with your embroidery machine. Practice and experimentation are essential to refine your skills. By investing time in learning the intricacies of the software and understanding the behavior of different fabrics and threads, you can successfully digitize custom embroidery designs that are ready to be stitched out on your machine.
Lascia un commento