
Una guía para principiantes sobre vectores 2D para corte CNC
Tabla de contenido
Master the art of 2D vectors for flawless CNC cutting.
Introducción
A Beginner’s Guide to 2D Vectors for CNC Cutting is a comprehensive introduction to the fundamental concepts and techniques involved in using 2D vectors for CNC cutting. This guide aims to provide beginners with a clear understanding of how to create, manipulate, and optimize 2D vectors for CNC cutting applications. Whether you are new to CNC cutting or looking to enhance your skills, this guide will equip you with the knowledge and tools necessary to create precise and efficient designs for CNC cutting.
Understanding the Basics of 2D Vectors for CNC Cutting
Una guía para principiantes sobre vectores 2D para corte CNC
Understanding the Basics of 2D Vectors for CNC Cutting
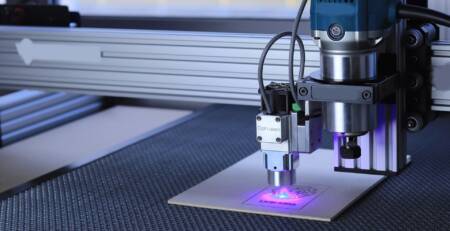
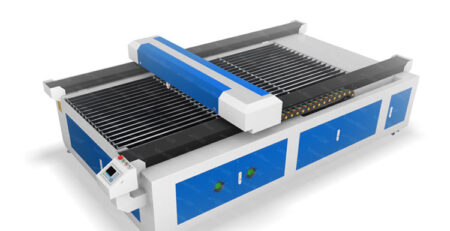
Computer Numerical Control (CNC) cutting has revolutionized the manufacturing industry, allowing for precise and efficient cutting of various materials. One of the fundamental concepts in CNC cutting is the use of 2D vectors. In this beginner’s guide, we will explore the basics of 2D vectors and their importance in CNC cutting.
To begin with, let’s define what a vector is. In mathematics, a vector is a quantity that has both magnitude and direction. In the context of CNC cutting, a 2D vector represents a line or a shape that needs to be cut. These vectors are typically defined by a series of points or coordinates.
The first step in working with 2D vectors for CNC cutting is creating or importing the vector file. This file can be created using various software programs, such as computer-aided design (CAD) software. It is important to note that the vector file should be in a format that is compatible with the CNC machine, such as DXF or DWG.
Once the vector file is ready, it needs to be converted into a format that the CNC machine can understand. This process is known as CAM (Computer-Aided Manufacturing) programming. CAM software takes the vector file and generates the toolpaths and cutting instructions for the CNC machine.
Now that we have a basic understanding of 2D vectors and their role in CNC cutting, let’s explore some key concepts related to working with vectors. One important concept is scaling. Scaling allows us to resize the vector while maintaining its proportions. This is particularly useful when working with different-sized materials or when creating multiple copies of the same vector.
Another important concept is rotation. By rotating a vector, we can change its orientation on the material. This is useful when cutting shapes that need to be aligned in a specific direction or when creating symmetrical designs.
In addition to scaling and rotation, we can also apply other transformations to vectors, such as translation and mirroring. Translation allows us to move the vector along the X and Y axes, while mirroring creates a mirror image of the vector.
It is worth mentioning that vectors can also be combined or modified using Boolean operations. These operations include union, intersection, and difference. Union combines two or more vectors into a single vector, intersection creates a vector that represents the overlapping area of two vectors, and difference subtracts one vector from another.
Understanding the basics of 2D vectors is crucial for successful CNC cutting. By mastering the concepts of scaling, rotation, translation, mirroring, and Boolean operations, you will be able to create intricate and precise designs for your CNC projects.
In conclusion, 2D vectors play a vital role in CNC cutting. They represent the lines and shapes that need to be cut and are created or imported using CAD software. CAM programming converts the vector file into toolpaths and cutting instructions for the CNC machine. By understanding concepts like scaling, rotation, translation, mirroring, and Boolean operations, you can create complex and accurate designs for your CNC projects. So, dive into the world of 2D vectors and unlock the full potential of CNC cutting.
How to Create and Manipulate 2D Vectors for CNC Cutting

Una guía para principiantes sobre vectores 2D para corte CNC
Computer Numerical Control (CNC) cutting has revolutionized the manufacturing industry, allowing for precise and efficient cutting of various materials. One of the fundamental concepts in CNC cutting is the use of 2D vectors. In this article, we will explore how to create and manipulate 2D vectors for CNC cutting.
To begin, let’s understand what a 2D vector is. In mathematics, a vector is a quantity that has both magnitude and direction. In the context of CNC cutting, a 2D vector represents a line or a path that the cutting tool will follow. It is essentially a set of coordinates that define the shape to be cut.
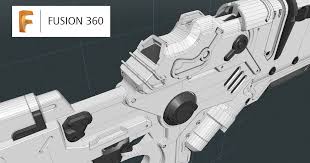
Creating a 2D vector for CNC cutting starts with designing the desired shape using computer-aided design (CAD) software. CAD software allows you to draw lines, curves, and shapes, which can then be converted into 2D vectors. These vectors are typically represented as a series of points connected by straight lines or curves.
Once you have created the shape in CAD software, you can export it as a vector file format, such as DXF or SVG. These file formats are widely supported by CNC machines and can be easily imported for cutting.
Now that you have your vector file, you can manipulate it to suit your cutting needs. One common manipulation is scaling, which involves resizing the shape. Scaling can be done uniformly, where the entire shape is resized proportionally, or non-uniformly, where different dimensions are scaled differently. This allows you to adjust the size of the cut without having to redraw the entire shape.
Another manipulation technique is rotation. By rotating the vector, you can change the orientation of the cut. This is particularly useful when cutting complex shapes that require precise alignment. Rotating the vector allows you to achieve the desired angle without having to redraw the shape manually.
In addition to scaling and rotation, you can also perform other operations on 2D vectors, such as mirroring and offsetting. Mirroring involves creating a mirror image of the shape, either horizontally or vertically. This can be useful when cutting symmetrical shapes or when you need to create a negative of the original shape.
Offsetting, on the other hand, involves creating a new vector that is parallel to the original shape but at a specified distance. This can be useful when you need to cut multiple copies of the same shape, each with a slight variation in size.
To manipulate 2D vectors, you can use specialized software or programming languages that support vector operations. These tools provide a range of functions for scaling, rotating, mirroring, and offsetting vectors, making it easier to create complex cuts.
In conclusion, 2D vectors are an essential concept in CNC cutting. By creating and manipulating vectors, you can design and cut intricate shapes with precision. Understanding how to create and manipulate 2D vectors will enable you to unleash the full potential of CNC cutting technology and take your manufacturing capabilities to new heights.
Advanced Techniques for Optimizing 2D Vectors for CNC Cutting
Una guía para principiantes sobre vectores 2D para corte CNC
CNC cutting has revolutionized the manufacturing industry, allowing for precise and efficient cutting of various materials. One of the key elements in CNC cutting is the use of 2D vectors, which serve as the blueprint for the cutting process. In this article, we will explore the basics of 2D vectors and provide some advanced techniques for optimizing them for CNC cutting.
To begin with, let’s understand what a 2D vector is. In simple terms, a 2D vector is a mathematical representation of a line or shape in a two-dimensional space. It consists of two components: magnitude and direction. The magnitude represents the length of the vector, while the direction indicates the angle at which the vector is pointing.
When it comes to CNC cutting, 2D vectors are used to define the paths that the cutting tool will follow. These vectors are typically created using computer-aided design (CAD) software, which allows designers to draw precise shapes and lines. Once the vectors are created, they can be exported in various file formats, such as DXF or SVG, which are compatible with CNC machines.
Now that we have a basic understanding of 2D vectors, let’s delve into some advanced techniques for optimizing them for CNC cutting. One important aspect to consider is the resolution of the vectors. Higher resolution vectors will result in smoother and more accurate cuts. This means that it is crucial to create vectors with enough detail to capture the desired shape or line accurately.
Another technique for optimizing 2D vectors is to minimize the number of nodes or control points. Nodes are the points that define the shape of a vector, and having too many of them can lead to unnecessary complexity and slower cutting times. By reducing the number of nodes, the CNC machine can follow the vector more efficiently, resulting in faster and more precise cuts.
Furthermore, it is essential to ensure that the vectors are closed shapes whenever possible. Closed shapes are easier for the CNC machine to follow, as they do not require the cutting tool to reposition or lift off the material. This can significantly reduce cutting time and improve overall efficiency.
In addition to optimizing the vectors themselves, it is also crucial to consider the cutting parameters. These parameters include the cutting speed, feed rate, and depth of cut. By adjusting these parameters based on the material being cut and the desired outcome, you can achieve optimal results. For example, cutting too fast or with too much force can result in material damage or inaccurate cuts, while cutting too slow can lead to excessive wear on the cutting tool.
Lastly, it is worth mentioning the importance of testing and refining the vectors before starting the actual cutting process. This can be done by simulating the cutting path using specialized software or by creating prototypes using inexpensive materials. By doing so, you can identify any potential issues or areas for improvement and make the necessary adjustments before wasting valuable time and resources.
In conclusion, 2D vectors are a fundamental element in CNC cutting, serving as the blueprint for the cutting process. By understanding the basics of 2D vectors and implementing advanced techniques for optimization, you can achieve precise and efficient cuts. Remember to consider factors such as resolution, node count, closed shapes, cutting parameters, and testing to ensure optimal results. With practice and experience, you will become proficient in creating and optimizing 2D vectors for CNC cutting.
Conclusión
In conclusion, A Beginner’s Guide to 2D Vectors for CNC Cutting provides a comprehensive introduction to the concept of 2D vectors and their application in CNC cutting. The guide covers the basics of vector representation, vector operations, and their significance in CNC cutting processes. It offers clear explanations, practical examples, and helpful tips for beginners to understand and utilize 2D vectors effectively in CNC cutting projects. Overall, this guide serves as a valuable resource for individuals looking to enhance their knowledge and skills in CNC cutting using 2D vectors.
Deja una respuesta